A while ago we played a game of Modern Bolt Action using Jay White's fantastic rules adaptation.
The scenario was a Hostage Rescue of two high ranking dignitaries that had been kidnapped and held hostages by Insurgents in a fictitious Middle East town.
The Special Forces Task Force caring out the rescue comprised of three (3) teams of Tier One operators with a Sniper Team on Overwatch. Air support assets were on stand by when required.
The town was swarming with Insurgents and the local population who were not to welcoming of the the Task Force Operators, with any local member of the population possibly being a suicide bomber at any time. The Task Force lost a team to one bringing them to two(2) teams and a Sniper Team. (I forgot to take photos).
The Task Force Operators had to move from building to building, and clear each one to locate the one that had the Hostages, that was premarked before the game by the insurgents player (Myself). To clear a building the Task Force Operators had to make it to a door or window and spend a turn. At the same time the Insurgents were hunting them down.
In the end with the Insurgents suffering heavy loses in men and vehicles, and a Close Quarters Battle from room to room, the Task Force was successful in caring out the mission but not before a bloody firefight having stirred the Hornet's Nest.
I have attached a link to a short video below of a walk through the table on the aftermath of the battle.
 |
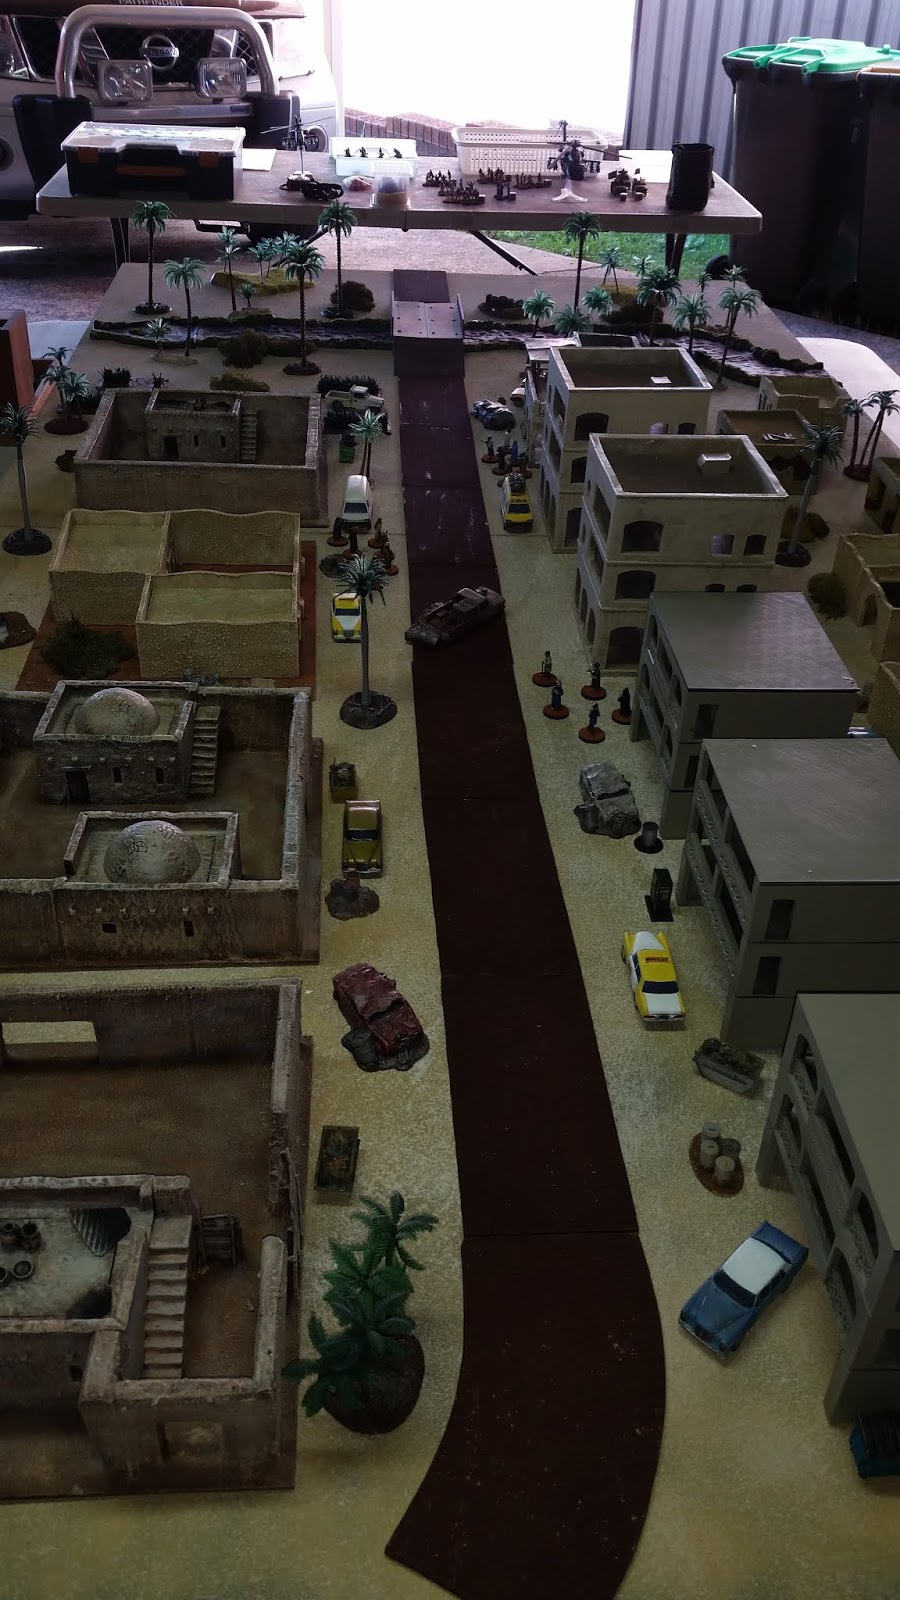
| The Town looking down the main street towards the bridge and river. |
 |
| Some of the locals. |
 |
| A look at the town from the bridge and river side. |
 |
| A pack of Insurgents on the prowl after hearing choppers in the distance. |
 |
| More Insurgents on the prowl. |
 |
| The first two Task Force teams inserted onto a rooftop by chopper. |
 |
| More locals going about town. |
 |
| Insurgents moving onto the main road looking for infidels. |
 |
| More locals. |
 |
| Task Force Sniper Team on overwatch after infiltrating onto a roof top. This team was very successful in holding back Insurgent's reinforcements at the bridge. |
 |
| Having cleared a compound and finding it empty, the first Task Force team blasts a hole in the wall to make their escape after the main entry is cut off by Insurgents, but not before a bloody fire fight costings them the loss of a team member. |
 |
| With the Hornet's Nest now stirred, the Insurgent's put out the call for reinforcements. An Insurgent's jeep races over the bridge towards the sound of gun shots. |
 |
| The second Task Force team prepares to breach the rear door to an apartment |
 |
| Insurgents frantically running about the town looking for the Task Force teams. |
 |
| Another Insurgent's team moving about the town. |
 |
| Back at the bridge, the Insurgents jeep that was rushing to join the fight was taken out by small arms fire and a UGL 203 round by the third Task Force team that had been tasked with covering any approaches from the bridge. |
 |
| Having destroyed the Insurgent's jeep on the bridge, the third team awaits further targets. |
 |
| Back up arrives for the Insurgents in the form of an AA Gun on a Technical. |
 |
| The third Task Force team opens up... |
 |
| ... and destroys the technical |
 |
| Mean while, the second Task Force team having had no success at the first apartment blocks moves on to the next location. |
 |
| Insurgents closing in on the Task Force teams. |
 |
| With the Hornet's Nest stirred and things heating up, the Task Force successfully calls in air support with an Apache Gunship arriving |
 |
| Apache on the hunt. |
 |
| Having located a target, the Apache opens up ... |
 |
| ...and takes out more Insurgent's reinforcements on the bridge. |
 |
| But the Insurgent's keep trying to cross the bridge to get to the battle... |
 |
| ...with the two jeeps and a BMP1 IFV. |
 |
| An aerial view of the Insurgent's vehicles on the bridge, with the third Task Force team to the right behind the palm tree. |
 |
| The third Task Force team located near the bridge being in contact with Insurgent's and more arriving at the bridge, deiced to hot wire a ute and move out. |
 |
| The first Task Force team having lost a team member presses on with the mission. They would later be all taken out after coming across a group of locals with one of them being a suicide bomber. |
 |
| The Insurgent's BMP1 IFV and a jeep in destroyed by an A10 Thunderbolt that was successfully called in by the Third Task Force team before leaving their location. This would eventually block the bridge from allowing any further reinforcements arriving from that end. |
 |
| Having successfully hot wired a ute, the Third Task Force team moves towards a block of apartments, were they have been informed that the Hostages are located. |
 |
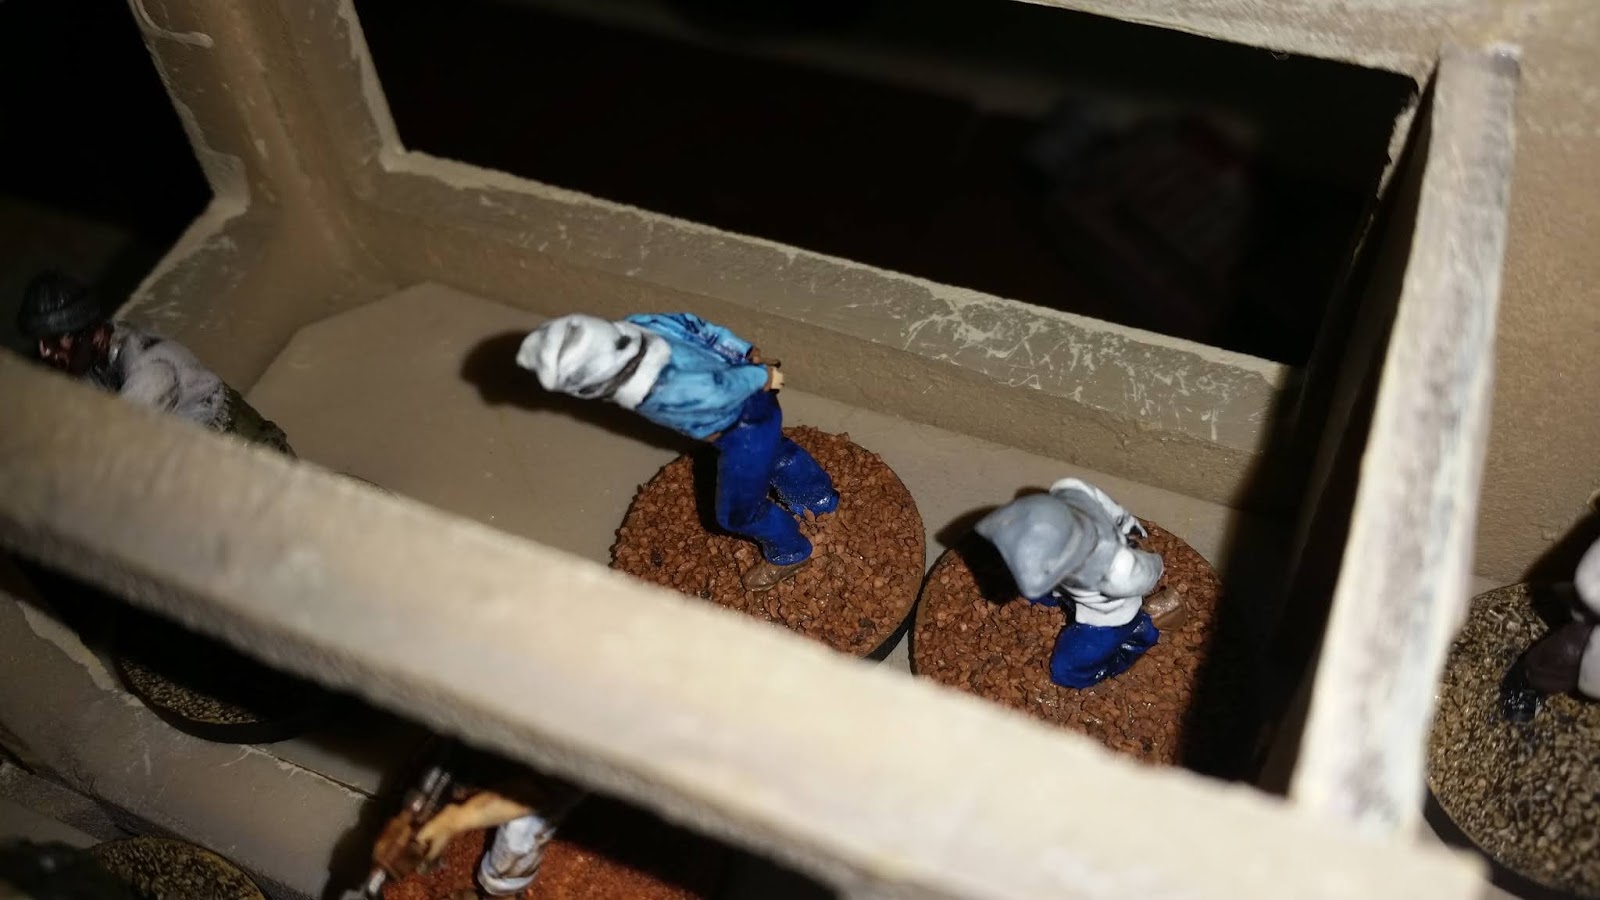
| The Hostages on the top floor of the apartment block. |
 |
| The insurgents in the apartment block wait in ambush. |
 |
| The third Task Force team having successfully stunned the Insurgents with Flash Bangs breach the top floor and open up. |
 |
| The Hostages having hoods over their heads can only wait in terror as to what is happening. |
 |
| The insurgents are no match for the Task Force operators... |
 |
| ...as they are cut down and the hostages rescued. |
 |
| Having completed the mission, two of the Task Force teams make their way to the rooftop and call in a Blackhawk for extraction. |
 |
| The Blackhawk arriving. The Insurgents tried to shoot it down with RPG's but were unsuccessful. |
Attached below is a short video on a walk around the table on the aftermath of the game.
https://www.youtube.com/watch?v=MwePcTNCrMI&feature=youtu.be


Great looking game!!! Table is awesome!
ReplyDeleteThanks brother.
DeleteAwesome looking game! Love the sniper team.
ReplyDeleteThank you kind sir.
Delete